
Employee scheduling software has become an essential tool for modern businesses. It streamlines how employers create schedules, define user roles, and manage their workforce in real-time. Whether you run a bustling restaurant, a retail store, a healthcare practice, or any other operation with shifting staff demands, an effective scheduling tool can radically simplify your day-to-day tasks. In this guide, we’ll explore everything you need to know about implementation and onboarding—specifically, how to set up your account and configure all those important details that keep your organization running smoothly.
Below, we’ll cover the practical steps for scheduling software account creation, including business settings, user permissions, and overall customization. We’ll also dive into best practices for onboarding, so your team can confidently adopt and use your new system from day one. Ready to discover how to create an account for scheduling software and supercharge your operational efficiency? Let’s get started!
1. Key Benefits of Employee Scheduling Software
Before diving into how to create a scheduling account, let’s explore why scheduling software has become a game-changer. Understanding the benefits can help you build a strong case for internal buy-in, from frontline employees to top-level executives. With solutions like Shyft’s employee scheduling platform, you can centralize communication, automate shift rotations, and reduce administrative stress.
- Streamlined Shift Management: Scheduling software empowers managers to create, edit, and share schedules instantly.
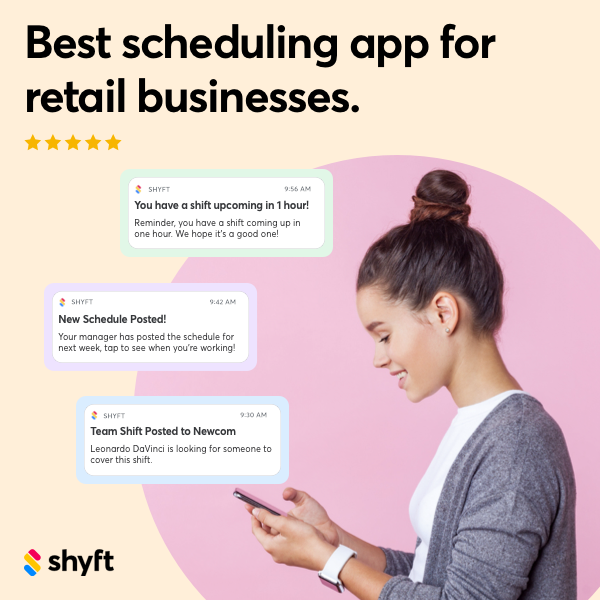
- Improved Team Communication: Tools like Shyft’s team communication features let staff receive real-time updates.
- Reduced Errors and Conflicts: Automated systems minimize double-booking and inadvertent overtime.
- Accurate Attendance Tracking: Comprehensive reporting helps monitor hours worked and compliance needs.
By incorporating this technology, you’re not just buying a product—you’re investing in smoother operations. From retail to hospitality and beyond, organizations of all sizes rely on scheduling software to boost efficiency and enhance team morale. Understanding these benefits helps you prepare for the next phase—implementation.

2. Pre-Implementation Preparation
Before you jump into your scheduling software account creation, you need a solid plan. A little groundwork will ensure that your transition is smooth. Think of this step as laying the foundation for your success: gather information, identify your business needs, and set clear goals. This is also the ideal time to decide who will oversee the system’s administration and user permissions setup.
- Clarify Business Requirements: Determine whether you need advanced features like shift marketplace, time clock integration, or labor cost forecasting.
- Define Roles: If you plan to define roles in a scheduling app, list out positions such as Administrators, Supervisors, and Standard Employees.
- Gather Employee Data: Compile names, positions, and preferred hours. Having these details ready speeds up account setup.
- Check Technical Requirements: Verify computer, mobile device, or network readiness for your chosen platform.
The key is to map out your desired scheduling workflow. This includes identifying peak labor demand, break policies, and any compliance mandates. Doing so helps you tailor the software to your specific industry—whether it’s healthcare, airlines, or a local café. Once you’ve determined your unique requirements, you’re ready to create your business profile in the scheduling app and proceed to account setup.
3. Setting Up Your Account: Getting Started
This phase is often called the “account setup guide” and typically involves registering for a new account, creating a business profile, and populating basic company details. If you’re learning how to create a scheduling account for the first time, simply follow the platform’s registration prompts.
- Register Your Business Profile: Provide the company name, address, and other core information. This is the bedrock of how to setup scheduling software correctly.
- Choose a Plan: Decide which subscription tier fits your needs—some platforms, like Shyft, offer flexible pricing based on the number of employees or advanced features.
- Provide Contact Details: Enter administrative contact data for system alerts, billing, or password recoveries.
- Confirm Your Email: Verify ownership of the account so you can log into the main dashboard and access scheduling tools.
In many scheduling software solutions, this initial setup takes only a few minutes. Once complete, you’ll typically land on your main administrative panel, where you can start adding employees and customizing settings. For instance, this Shyft guide can walk you through the essential steps of optimizing your account, ensuring you’re leveraging the platform to its fullest.
4. Defining Roles and Permissions
Once you have your basic account, the next crucial step is setting up user permissions. This involves determining who gets administrative control, who can approve requests, and who can simply view or swap shifts. In many platforms, these are referred to as roles—Administrator, Manager, Supervisor, or Employee. Defining roles in a scheduling app properly gives you granular control over security and functionality.
- Administrator: Has the highest level of control, can adjust system-wide settings, customize scheduling software features, and create user roles.
- Manager or Supervisor: Handles day-to-day scheduling tasks, manages approvals, and monitors attendance.
- Standard Employee: Views their own schedules, can request shifts, and sometimes swap or trade shifts based on permissions.
When you set user permissions in scheduling software, you’re aligning system controls with real-world responsibilities. This is invaluable for compliance and accountability. Also, consider employing custom roles if your business needs more nuanced levels of access—like a team lead who can edit schedules for a specific department but not see company-wide financial data. Once your permission levels are set, you can proceed to customize scheduling settings to match your organizational needs.
5. Customizing Your Scheduling Settings
Software customization is what transforms a basic scheduling platform into a finely tuned tool for your business. This step focuses on tailoring shift templates, setting break rules, and configuring notifications. Remember, the goal is to make the system work for you, not the other way around. By aligning your platform with your brand and operational requirements, you’ll streamline your day-to-day scheduling tasks and reduce confusion among employees.
- Shift Templates: Create prebuilt schedules for repetitive roles or tasks, saving you hours every week.
- Break & Overtime Rules: Set compliance guidelines or break intervals to avoid labor law infractions.
- Notification Preferences: Decide which alerts employees and managers receive—schedule changes, upcoming shift reminders, etc.
- Branding Elements: Some solutions allow you to add a logo or color schemes to unify the app with your company’s identity.
Scheduling software customization should extend to the user experience. For instance, hospitality scheduling might need more stringent break rules and optional multi-location scheduling to accommodate traveling staff. By fine-tuning these settings early, you reduce the risk of confusion and ensure a smoother onboarding experience for new hires.
6. Onboarding Your Team
Even the best scheduling software can fall flat if your team isn’t comfortable using it. Effective onboarding closes that gap by offering training, resources, and hands-on practice. When employees understand how to request time off, swap shifts, or view pay stubs, they’ll be more engaged and less likely to make errors. This is where a thorough account setup guide, combined with system training, can pay major dividends.
- Hold Training Sessions: Offer group or one-on-one demos to walk employees through key app features.
- Provide Tutorials: Links to step-by-step guides or short videos help staff master everything from shift swapping to direct messaging.
- Encourage Mobile Adoption: If the platform has a mobile app, highlight its importance for real-time updates, requests, and schedule views.
- Gather Feedback: Invite employees to share thoughts on usability. This input often reveals where processes can be streamlined.
Some organizations weave onboarding into a broader employee onboarding program, ensuring new hires learn about the scheduling system from day one. Others rely on a phased rollout—managers first, then supervisors, then employees. Whichever approach you choose, robust training builds confidence and reduces friction across all levels.
7. Navigating Your Business Profile
Your business profile in the scheduling app is the central hub for essential details such as location, departments, and operational hours. This is also where you can incorporate pay rates or compliance documents if your platform supports advanced data entry. Fully populating your profile can expedite future changes—like adding new departments or adjusting store hours during peak seasons.
- Location Details: Specify addresses, contact numbers, or hours of operation. Critical for shift-based roles in multiple branches.
- Department Structures: Label each department (e.g., Sales, Housekeeping) to filter scheduling by role or skill set.
- Policy Documentation: Upload relevant policies or guidelines. This ensures everyone has access to the rules.
Investing time here can simplify future tasks like schedule rotation changes or multi-site management. For example, if you run a chain of stores, each location can have its own schedule settings. A “business profile scheduling app” approach doesn’t just help you set up scheduling software effectively—it also ensures you have a one-stop reference point for compliance, security, and logistical details.

8. Tips for a Successful Rollout
Now that you’ve set user permissions, customized settings, and navigated your business profile, you’re nearly ready for a full-scale launch. A measured rollout can help your employees adapt more quickly, while giving you the chance to tweak settings on the go.
- Run a Pilot Program: Try the system with a small group to identify potential issues before organization-wide implementation.
- Communicate Early & Often: Use staff meetings or email updates to let employees know about upcoming changes and how the software benefits them.
- Set Clear Expectations: Outline new scheduling policies—like advance notice for swaps or mandatory confirmations—so everyone knows what’s required.
- Measure Adoption: Track login rates, shift swap requests, and schedule view counts to see who’s using the system and who needs help.
As your team grows comfortable with the platform, you can delve into more advanced features like AI-assisted scheduling or integrated payroll solutions. And remember: if you run into roadblocks, most reputable scheduling software providers have extensive documentation or customer support to guide you. If you haven’t yet, consider exploring Shyft’s shift marketplace if you need to cover last-minute gaps without exhausting your core team.
Conclusion
Implementing employee scheduling software doesn’t have to be overwhelming. By planning thoroughly—defining roles, gathering your company data, and customizing essential features—you pave the way for a smoother onboarding experience. The time you invest now yields dividends later: fewer scheduling errors, streamlined communication, and a happier, more engaged team.
Whether you’re in the midst of setting up your very first account or refining an existing system, remember that ongoing support is essential. Keep refining your settings, gathering feedback, and training new hires promptly. With the right approach, your scheduling software will become a central pillar of your operational success. If you’re ready to give your workforce management a boost, explore solutions like Shyft’s employee scheduling software and see how intuitive shift planning can help your business thrive.
FAQ
1. What is the first step in setting up scheduling software?
The first step typically involves creating your account and registering your business profile. This includes adding basic organizational information like business name, location, and contact details. After verifying your email, you’ll get access to the main dashboard where you can add employees, configure permissions, and customize your scheduling rules.
2. How do I define user permissions without complicating the process?
Begin with three core roles—Administrator, Manager, and Employee—then customize if needed. The Administrator has full control over settings, while Managers handle day-to-day scheduling. Standard Employees can view their shifts, request changes, and perform additional tasks based on permission levels. This approach keeps things simple yet comprehensive.
3. Can I customize the scheduling software for different departments?
Yes. Most scheduling platforms let you add and name distinct departments. You can then tailor schedules, roles, and even policies for each department. This level of customization helps you manage multiple teams or locations from one central dashboard, ensuring everyone’s unique needs are met.
4. What’s the best way to onboard employees?
Hands-on training is key. Schedule brief demos to show employees how to check shifts, request changes, and communicate through the platform. Supplement this with brief how-to videos or step-by-step guides. Encouraging mobile adoption is also essential, so staff can access schedules and receive notifications on the go.
5. Is it necessary to pilot the software before a full rollout?
While not mandatory, piloting the software in one department or a small test group can reveal potential issues early on. This allows you to adjust settings, fine-tune roles, and gather feedback in a controlled environment. As a result, your wider implementation can go more smoothly.